Blog #42 Meg Swansen on How to Design Fair Isle
Dear Knitter,
Have you ever wanted to design your own Fair Isle Pattern? Here are some ideas and suggestions to encourage you to plunge in.
Choosing Color Schemes: Color selection and swatching is a deep and fraught subject. I will not address this aspect in detail, except to say that Fair Isle knitting is unique in its use of color. Both the motif and the background may shift colors as you knit (but not at the same time). And, the oxo height is nearly always an uneven number of rows, enabling you to use an unexpected color in the middle. I highly recommend Janine Bajus’ The Joy of Color: Fair Isle Knitting Your Way, and Fair Isle Knitting: 22 Traditional Patterns from Where the Atlantic Meets the North Sea, by Carina Olsson as resources. Choosing just a few colors (between 2-5) to work with will achieve beautiful results.
Incorporating Pattern Motifs: But what about the pattern motifs themselves and how to fit them into your project? Traditional Fair Isle Knitting by Sheila McGregor is an excellent source for hundreds of motifs - all arranged by height [anywhere from 1 to 35 rows high]. To create your own original motif, you need nothing more than graph paper and a pencil, or a computer program. There are many computer charting systems available, but the very first one to come to market was Stitch Painter. It remains my favorite program for color pattern charts.
Studying existing patterns and color selections, either from books or photos of Fair Isles garments, can be very instructive and helpful. Choose the wanted width and height of a pattern (whether hat, sweater, or vest) and outline the basic shapes you want.

For instance, when designing my Fair Isle cardigan and vest, I chose a 32-stitch/15 row repeat, and made a template. Then had the enjoyment of filling in different possibilities for motifs. I eventually settled on a total of 6 bands of oxo, no two alike, separated by a Peerie which faced in alternating directions between each oxo band. When considering the width of the pattern repeat, remember that on taller motifs, the horizontal repeat is usually longer, but a shorter/narrower repeat allows you to more easily adjust to the circumference of a garment. Try any number of different approaches to build your pattern.
Applying Motifs to a Garment: When it comes time to applying your motifs to a garment, here are some guidelines:
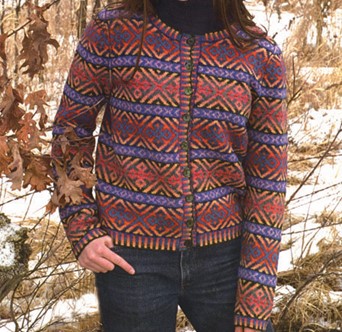
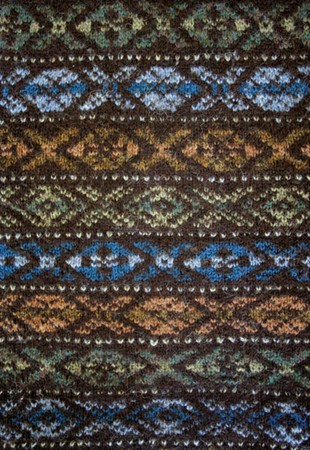
1. Traditional Fair Isles usually have oxo motifs separated vertically by “peeries", which are small 5 to 9 row simple spacing motifs. Shown below in Betts Lampers' stunning Autumn Color Fair Isle Cardigan.
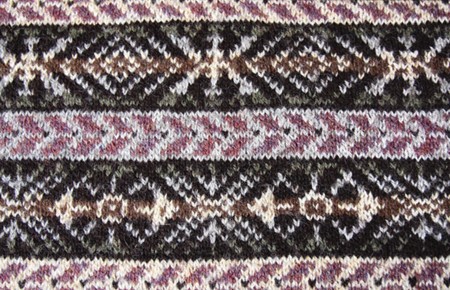
2. The oxos can be the same pattern, with rotating or alternating color layouts (as seen in Cully's Fair Isle Vest below); or they can be a few series of different motifs, which rotate as the garment is worked. If you use different motifs, make then all the same height.
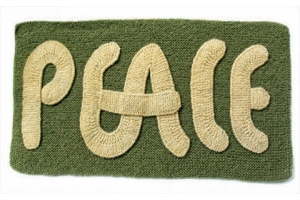
You may want to build a pattern based on someone's name, or based on a plant or animal shape, or an abstract of the traditional oxo shapes. Or, for instance, try charting Estonian, Latvian, or Peruvian motifs; options are boundless.
Knitting Swatch Caps: Start by knitting a few sampler hats (or, as we call them, Swatch Caps), which are usually 6-8 inches deep before the top decreases begin. Make sure you have a number of stitches around the hat which is divisible by your motif-repeat. When you reach the decrease section, either plan the number of decrease points based on how they will interact with the motifs - or pick equidistant decrease points and watch those decreases affect the motifs as you go, for a surprising finish.
I prefer the latter, and love to observe the motifs as they are uniformly nibbled away. The top shaping may be worked with about 5 to 7 single decreases which swirl L (ssk) or R (k2tog), or you can work double-decreases (turn 3 sts into one) to form straight lines to the top, eating into the motif on each side. It matters not which decrease you use - if set up evenly at the outset, a pleasing pattern will appear.
To use Elizabeth Zimmermann’s cap-top formula for 5, 6, or 7 single decreases: work them every-other-round until half the stitches have been decreased. Then work the decreases every round down to 5, 6, or 7 sts. Finish off. Plenty of knitting for you to determine if you like the colors, and to get an accurate gauge for both stitch and row count.
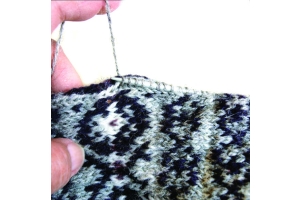
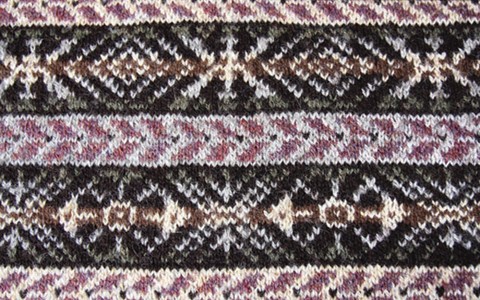
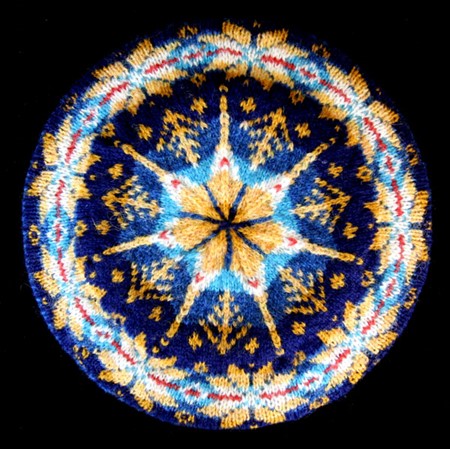
Below is an example of a Fair Isle Cap Swatch, with my numbers for fitting in the pattern.
oxo is 22 sts wide x 12 rounds high
the peerie is 6 sts wide and 5 rnds high
6 oxo repeats = 132 sts around the cap.
My gauge is about 6.25 sts per inch.
In a 6” height (before decreasing), there are 2.5 oxos and 2 peeries - with 2 plain rounds between each.
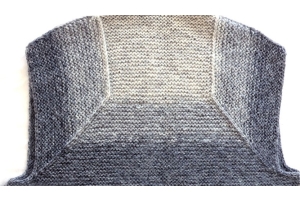
Knitting Vests or Sweaters: For a vest or sweater worked up from the lower edge (with stitch and row gauges exactly determined from your Swatch Caps); choose the wanted circumference and the height of your garment. Then arrange the motifs you have chosen to assure that they fit into your wanted height. This is far from precise; a few rounds more or less can be altered in the final blocking. However, I remain quite proud of the bit of magic Chris and I produced at the top of my Fair Isle Vest.
I hadn’t planned ahead, so the top was going to end at wanted shoulder height, as I approached that height, I saw the end was going to occur near the middle of an oxo. When I got to that last oxo, I chose to work back and forth on the front only completing the full oxo, then wove it to the back - being able to weave in the plain round between motifs on the back of the vest. There is no shoulder seam at all (vests don’t need them as sweaters might, since there is no sleeve weight to counteract).*
Off the Cuff Designing and Centering Patterns: Of course, you needn’t follow my non-planning approach. Alternatively, it is a simple matter of adding together heights of oxo’s and peeries (your Swatch Cap will tell you how tall each is, in inches) to fit the wanted garment height. Arrange things so the motifs align as you wish, and, if the sweater or vest is a pullover, be very fussy that the motif is perfectly centered in the middle of the front. You may decide to center the motif, or the space between two motifs. There is extensive help for centering in our book, Knitting with Two Colors.
As EZ said, “you are in charge of your knitting” - why not free your creative instincts and knit an original hat or two (or seven)? You will learn a great deal. Even if some of your Swatch Caps are less than spectacular, they will be practical and warm. There are scores of charitable organizations who will greet your handknitted woolen hats with a Glad Cry. Family and friends make wonderful recipients too. To quote EZ, “People will put anything on their heads!”
Good Knitting,
Meg
*This is all shown on the video Chris taped as I knitted the vest from cast-on to final blocking...all while we stayed in an old hand-hewn Icelandic log cabin on Washington Island. It is one of my favorite videos - along with the Guernsey video we shot along the Oregon coast. And, o yeah, I love the Faroese video too…..The Fair Isle Vest was taped in 1995 - I was still machine-stitching my steeks to secure them. Now knitters also have the options of crocheted steeks and felted steeks.
I love the videos Chris taped as you knit. When I watch them, I learn something new each time. I also listen to you as you lovingly talk about “camera guy” keeping an eye on your progress.
This blog post is from your wealth of knowledge and experience…and love of all things knit.
Thank you.
Maria