Blog #37 Meg Swansen on Picot Technique

Dear Knitter:
The current Wool Gathering issue, number 107, features a recently discovered Elizabeth Zimmermann design from the 1950s: a small color-patterned drawstring bag with a Picot edge along the top opening.
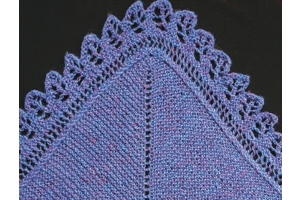
In case you are unfamiliar with this Picot application, it is very simple to execute, and even more effective as an edging when worked with a second color for the inner lining.
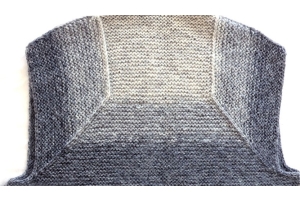
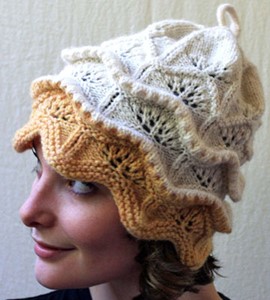
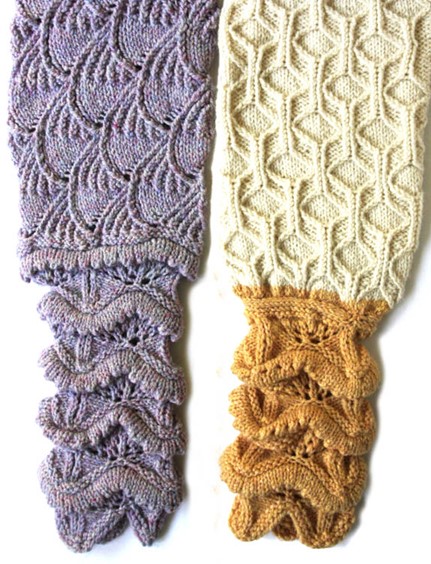
But it is not just for borders. In a German book of unique stitch patterns called Oma's Strickgeheimnisse (Grandma's Knitting Secrets), I was captivated by the Albrecht Dürer Tower chart, which utilized a pleat-technique with the Picot effect for stunning results. I translated that into a hat found in Schoolhouse Press Pattern #11. I also utilized the technique for cuffs on several raglan sweaters.
Here are general directions for these 2 Picot uses.
For Edges:
In an alternate hem color (and lighter weight wool, if possible), cast on and knit the hem. At wanted hem depth, switch to main color, and work a round of (yo, k2tog), which produces a set of holes. Knit on.
When done with the project (or after about 4-5" of knitting if you cannot wait to see the results), fold along the row of holes, and tack down the hem. The (yo, k2tog) holes help to facilitate the turn, and result in a decorative Picot edge.
For a more subtle appearance, do not use the alternate color for the hem.
For 'Pleats':
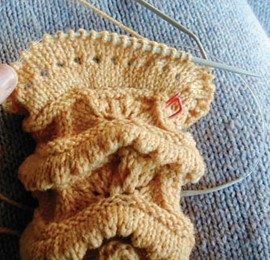
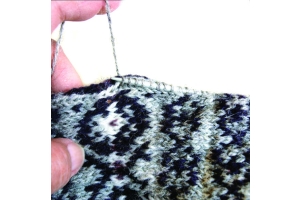
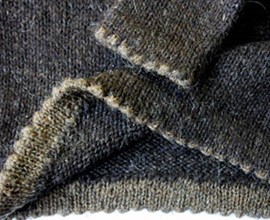
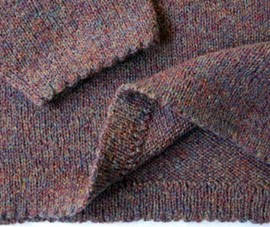
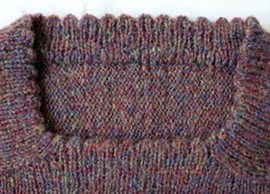
Step 1 (photo above): Knit 5 rounds of stocking-stitch, then one round of holes (yo, k2tog), then 5 more rounds of stocking stitch.
Step 2 (photo above): Turn the work inside-out and, with a second needle, pick up (from the inside) one strand for each stitch along the first round of stocking stitch.
Fold along the row of holes to make a Picot edge.

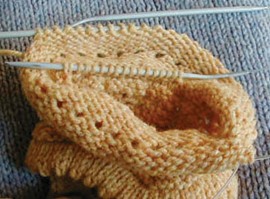
Step 3 (photo above): Align the pick-up needle with the original circular needle and, with the other end of the circ, k2tog around: being a picked-up strand together with a raw stitch. Repeat this whole process as often as you wish (for example in my hat or cuffs below).
You can, of course, put in any wanted patterns between the pleats, and you can work more or fewer rounds to alter the depth of the pleats.
Note: If you want to first try this technique in a swatch, to prevent your swatch from curling, work 4-5 ridges of garter-stitch first; back and forth, then join and proceed in stocking stitch.
My "knitting lessons" at present are confined to summer Knitting Camps, my books, dvds, plus the many videos contained in past issues of this blog. If it is techniques you are seeking, The Knitting Glossary (either on DVD or streaming) has over 130 techniques demonstrated.